 |
Win Condition: Tausendfussler defended.
Loss Condition: Tausendfussler shot down.
SR Point: All enemies shot down within five turns.
Condition Changes (Turn 3):
Win Condition: All enemies shot down. |
Doctor Kazahara's Tausendfussler and its anti-Aerogater cargo are being pursued by a rogue enemy force. With only minimal onboard weapons and no word of reinforcements, Kazahara's left to
take them all down in a lone Fussler run in the opposite direction as fast as possible.

Our pilot for the start of this map is unfortunately not Kazahara himself, but a faceless EFA pilot. Compared to pilots of similar level, the EFA Soldier has poor Melee and Ranged stats, extremely low Maneuverability and Defense, average accuracy and poor Evasion. This is a pilot that's carried by his machine, and the Tausendfussler is unfortunately on the bottom rung of mechs, below even the Type 71. The EFA Soldier relies on the Tausendfussler's high HP along with his Vigor Spirit Command to tank hits, which would be a generally viable strategy just for surviving...if his SP pool weren't so low that it could only cast one command per sortie. His role is instead intended as a support pilot, using Trust to replenish allied HP and Cheer to double the experience they gain for one battle, hopefully the killing blow on a high-level boss unit. As stated though, the EFA Soldier's SP only lets him cast one of these, so if you intend to cast Cheer or replenish allied hit points, it's best to keep him far from combat.
And while your immediate reaction may be to direct him in just the manner from my opening statement, the best way to complete this map is to move the Fussler to the eastern side of the lake, where ATX will arrive to provide backup on turn 3.

Since the range-1 Gatling Gun is the Schwert's only postmovement
weapon, and the enemy boss is stationary for this portion of the map, you can safely
pull the Soldier a minimum of 5 spaces away from the enemies and force
them to waste their turn chasing him over to where ATX will spawn, and otherwise spend that turn on taking minor Gatling Gun damage. The F-32 Schwert lacks the Messer's mobility and has easily shreddable armor, but tries to make up for it in HP and speed, darting over a whole 8 tiles per turn. She's small, has almost no weapon space, has an S in Air and a D in Space, with that S being restricted to an A due to the mystery pilots' terrain rankings. Her homing missiles are identical to the Messer's, making her a poor copy of it that's still above the Waldung. Next-generation fighter my
foot.
The ATX team introduces a new mech for this map, along with the new weapon equip mechanic. The
Gespenst Mark III Alteisen is our first permanent mech of the game, joining the team with no strings attached. She's a heavy armor, fast but low-mobility PT...minus the low-mobility part. Her high HP and EN let her go nearly anywhere on the battlefield and take a whole battery of hits with her armor. The Beam Coat on the Alt cuts 5 EN from her power supply to reduce all beam damage by 900 points, making for an amazing wall that can get right up there with the Type 0 with 500 more armor in upgrades. So the long and short of this setup is that the Alt is built to take hits like a Super, but
still has the dodging abilities of any Real Robot. Kyosuke's Focus only pushes that further, making the Alt an all-star of the mechanics that would make any individual machine "good" but on one mech put it up as a mainstay unit for the whole game.
She's got good weapon space--more than you'll ever use--and an S in ground warfare, with A/A for Space/Air and B in Water. She's medium sized, perfect for Kyosuke's Hit/Evade and aggressive attack stats. She also has 3/5 of her weapons as postmovement arms, with a max range of 4, effective range of 3 and unmoved range of 5. The Heat Horn doesn't see much use due to being range 1 and sharing that with the two of the Alt's three ultimate weapons. The Revolver Stake is her main loadout--it's an extremely powerful melee weapon with six shots and a range of 3. Upgrading the Stake also upgrades Kyosuke & Excellen's Rampage Ghost combination attack further down the line, making it necessary for the endgame and a very versatile weapon overall. The Heavy Claymore is the Alt's initial best attack, with 4 shots Range 1-2 and a 110 Will restriction. So it's easy to trigger but difficult to use due to not being postmovement. (Kyosuke fixes this with his Assail Spirit Command, which enables the use of premovement weapons as postmovement weapons for one turn, which also makes the Claymore a great bosskiller.) In addition to mostly being strong postmovement weapons with great accuracy and +35 to +50 Crit bonuses, the Alt's main armament is consistently kinetic or supreme across the board. That reveals a key aspect of the Alt--her melee focus, kinetic weaponry, beam coating & high range paired with Kyosuke's Accel makes her a devil of the water. The Alt can simply march in and let the enemy waste EN on her with beam weaponry, then slaughter them using the Stake or Claymore with Infight and 1.2x counterattack damage. The Alt is already a perfect fit for Kyosuke; slap a Water Jet on her, pump some PP in to upgrade Kyosuke's terrain rankings later on, and the two will have a field day at the beach.
(Note that once the reinforcements show up, we actually get an almost-exact copy of the EFA Soldier for our second Tausendfussler, letting us work around the "one Spirit per map" restriction the EFA is so fond of, but without Cheer factoring in.)
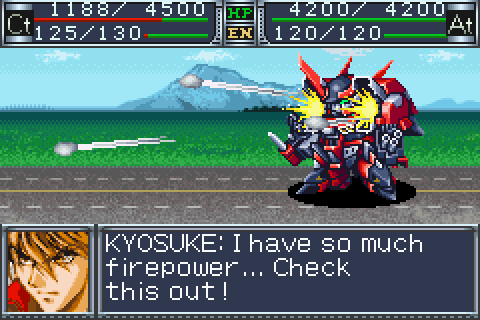
For this map I chose to make up for Bullet's unsuitable mech by assigning him to Kyosuke's old Gespenst Mark II (not Excellen's, because hers has that "custom" weaker Jet Magnum) and putting Excellen in the TT. While Excellen can't make use of the T-Link Ripper, she
can use the Mega Beam Rifle or the equippable M13 Shotgun (pictured) for much better damage than Bullet could use the Ripper. These changes are all temporary though, as the early maps of Original Generation love to cram your pilots back into their story-determined units.
In order to score the SR point, focus on mobilizing your units to the southwest, using Kyosuke with Strike or Sanger with Sense to pursue Tenzan. I generally use other units before Sanger, because he's something of a Jeigan character in Original Generation in that he doesn't have much room for growth or customization, and his raw power makes him an easy XP stealer that prevents your other pilots from developing early on. Note that even if you shoot down Tenzan before the Schwerts, the Schwerts will still remain on the map, so you can still score the SR point if you take him down first.

Tenzan's piloting a Lion Test Type, which has decent armor, poor mobility and speed, and HP/EN comparable to the Gespenst Mark III. It has an S in Air, A/A for Ground/Space and a C in Water. The weapon space is expansive and its medium size does help with keeping Hit/Evade consistent. The units' onboard weapons are lacking due to her only postmovement being a weak Gatling and none of her main arms being usable at Range 1, creating a deep flaw where the Lion TT cannot defend herself in close quarters despite being an assault-oriented Armored Module. The 6-Range Homing Missiles and Railgun
do make her an ideal sniper for Hit & Away/Snipe pilots. Ultimately the first generation in flight-based AMs is less clumsily implemented than in their PT counterpart, but this Lion brings nothing to the table that the Wildraubtier FM didn't already, or do better.
The big guy himself is basically what you want out of a Lion pilot, with Gunfight L1 to amplify the Railgun damage and an emphasis on his Range stat. Revenge powers up his counterattacks, but Prevail L1 is somewhat misplaced since Lions taking hits is a rare sight--for the most part they either dodge or go down in one blow. Thanks to his Defense, Tenzan can survive one blow from the Revolver Stake, but Heavy Claymore blows him out of the water and he can't really use Prevail even after taking so much damage since its main use is in stopping attacks that the Lion herself can't handle. He also can't use that S-Air thanks to his own terrain rankings, and so long as you have Focus active, that 241 sum Evade shouldn't mean too much.

After the stage is over you'll get a Water Jet part, and from the engagement you should have a Chobham Armor that you can equip. As discussed previously, you can put the Jet on the Alt and equip Excellen's mech with the Armor, to compensate for her weak stamina while turning Alt into a water devil. Of course, putting the Chobham on the Alt and a Water Jet on one of the Gespensts is another option, since Kyosuke's Accel lets him move freely in the first place while the Jet can help catch Gespys up, and the Chobham can save you a difference of
$35000 in the long run to put the Alt's Armor on the same level as the Type 0 (the difference between four and five levels of Armor is enormous.) For new game+ the Water Jet route is probably best for the Alt, while first runthroughs can benefit more from the saved cash and early defensive power. Taking the Chobham route will also leave you room to start upgrading the Revolver Stake, an important step towards Kyosuke's long-term development as a frontlinesman and bosskiller.
Next map: Soaring Dragon


No comments:
Post a Comment